I wrote about making the switch to a garage gym in a previous post–a move which has been great for both my physique and my wallet.
The First Project
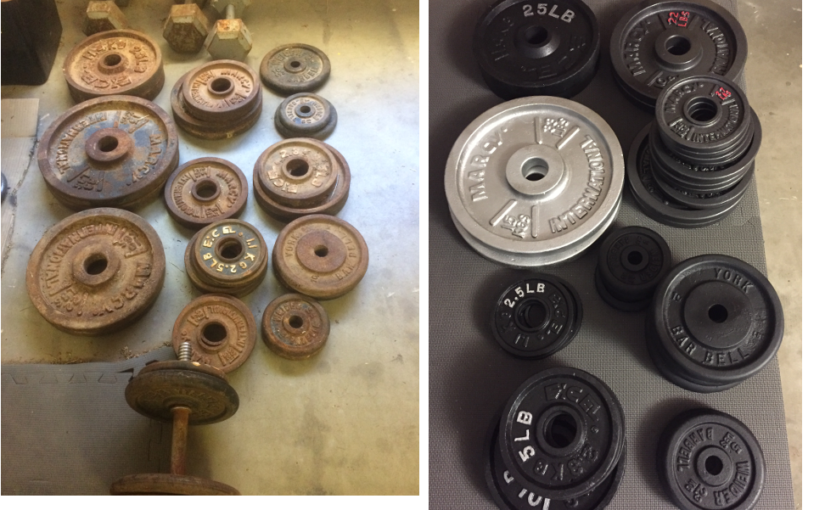
I mentioned the importance of looking for good deals on Craigslist if you are on a budget (which most of us are). Now Facebook Marketplace seems to be a much more popular option. That’s where I found my first prize: 300 lb. of plates. These were just sitting around in some guy’s back yard and he decided to clean things up and get rid of them.
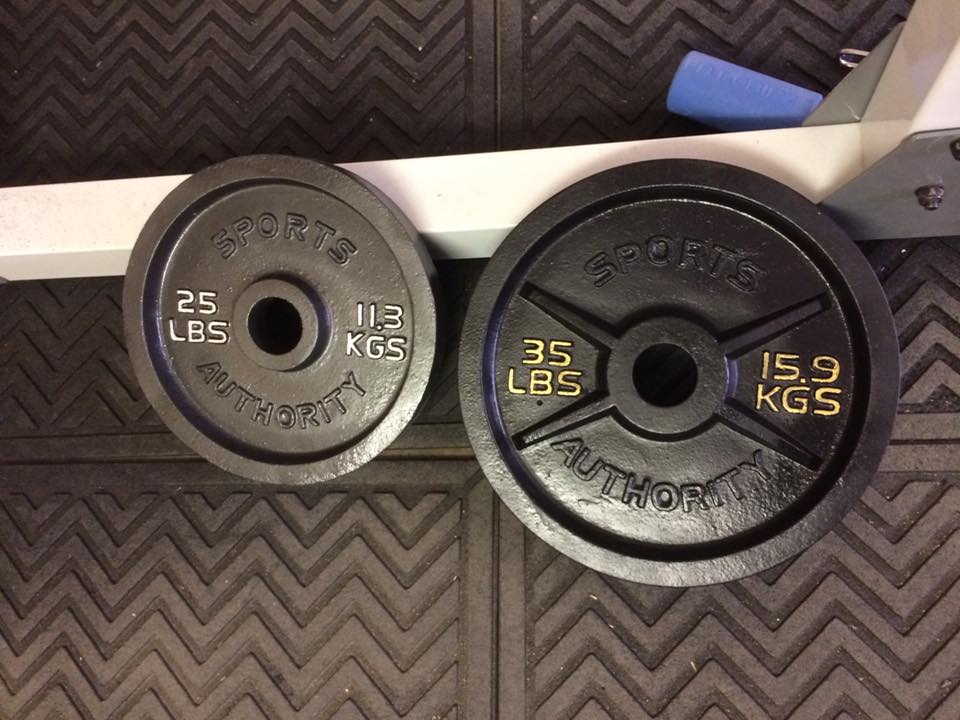
You may be able to buy used plates like this for about half of what they would cost new. New plates usually cost around a dollar a pound. I bought the first set of used weights for 55 cents a pound. You may get lucky and find weights for much less than that–there are people out there who just want to get rid of them and will sell them for pennies per lb. (or even give them away). But I was pleased with the price, especially since the guy selling them lives just minutes away from me. I was also really looking forward to having a set of 35 lb. plates.
The new additions to my gym needed a little TLC, so I began researching how to restore/refinish them. I discovered there’s more than one way to do it, so I’ll share both what I learned and what I did.
Restoring weight plates is a pretty simple process:
- Clean them and remove the rust
- Paint them
Getting rid of the dirt and/or rust
The way you choose do step 1 (removing the rust) will depend on the condition of the plates. My plates were in pretty decent shape once I rinsed them off, so I chose to physically remove the rust spots. You can use a hand-held wire brush for this, but I decided to buy a couple of wire wheels for my drill. I’d highly recommend this if you have a drill (or can borrow one). A 2-inch wire disk attachment will work really well on the hole in the center of the weight. A drill with the wire brush attachment will make quick work of rust spots. I’d advise you to wear safety glasses and a construction mask while doing this (better safe than sorry).
I just took a rag and wiped the plates off after hitting them with the wire wheel with my first weight restoration project. I’ve seen some mention using mineral spirits to clean, but I was a little concerned about damaging the existing paint surface (which wasn’t all that bad). I’m not sure it matters that much either way.
You can also use a vinegar bath (or even a commercial rust removal product) to get rid of the rust–this is especially useful for heavily rusted plates. I’ll cover this later when I talk about the second weight restoration project.
Re-Painting
 The first thing you’ll need to do is put the weights on some old cardboard (either outside or in a well-ventilated garage).
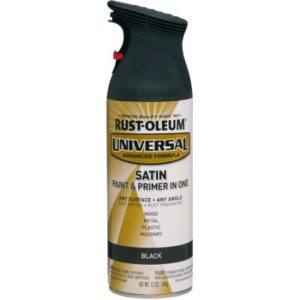
I used spray paint: Rust-Oleum Universal All Surface Paint and Primer. I used the black satin for the 35’s and the hammered black for the others. The hammered color has a really nice texture to it, and I wanted to make the 35’s a slightly different color (so I won’t accidentally pick up the wrong plate). There are other paint brands that may be just as good or better.
Coat one side, let it dry for a while, then put on a second coat if you want. Check and see if you missed any spots, and don’t forget to get the hole in the center of the plate.
Make sure the one side is 100% dry before you flip it and paint the other side–otherwise you’ll end up with cardboard stuck to the plate and you’ll have to brush and paint again. I made this mistake, and I would have let one side dry for a day (or at least overnight) if I had it to do over.
A couple of coats of paint and your plates will look good as new–or at least very functional. There may be a few tiny rust spots that I missed on these plates, but I’m not too worried about that. I just want to train without getting rust all over everything.
Here’s a before/after picture.
You can buy a Sharpie paint pen and paint the logo/numbers if you want. I painted the numbers just for the heck of it (put I didn’t bother with the brand/logo).
The Second Project
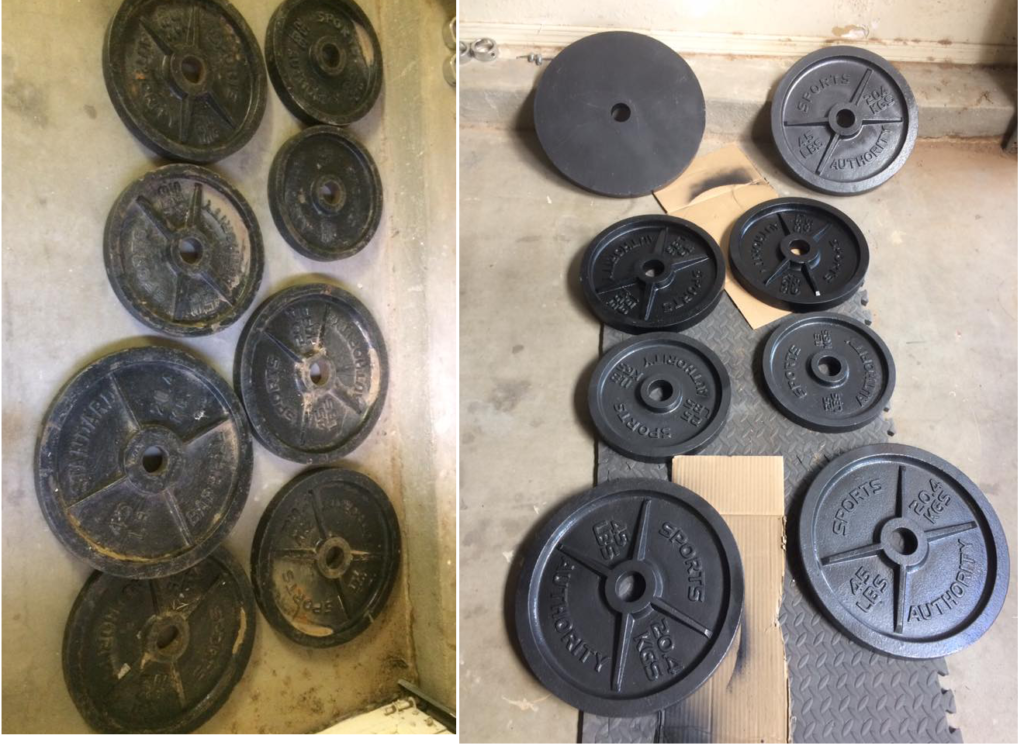
 The guy I bought the first set of used plates from contacted me a few months later. He had run across a bunch of used weights while working in someone’s back yard. The owner of the house practically gave the weights away to get them off his property and the savings were passed along to me.
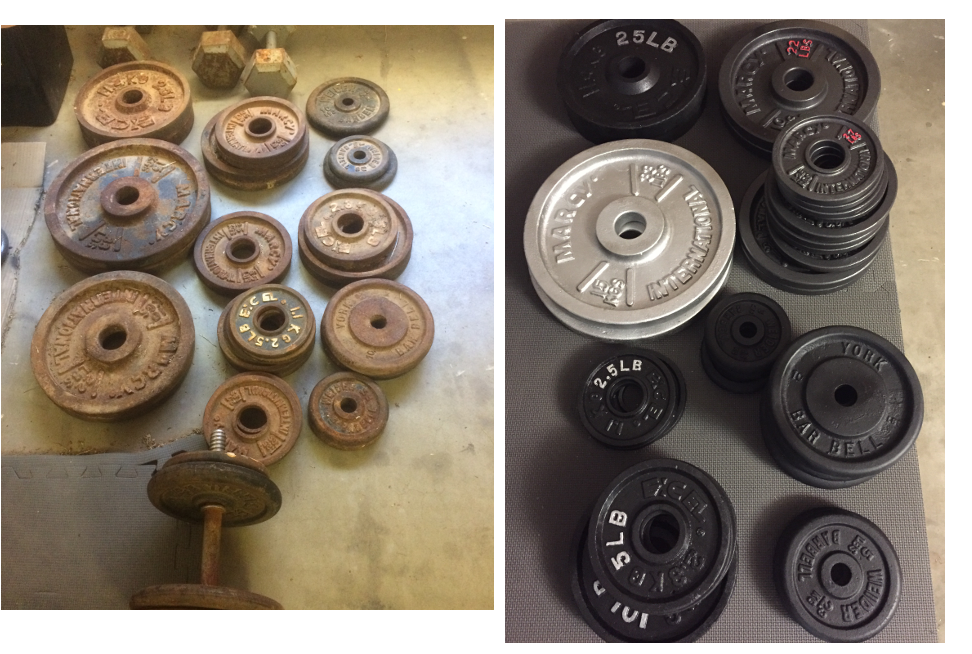
As you can see, these were completely rusted over. They were a mix-and-matched set that included metric weights, standard weights (pounds), dumbbell weights, and three solid dumbbells. I wasn’t really looking for some of these types of plates, but he offered to sell me the whole set (around 445 lb.) for 85 dollars (less than 20 cents a lb.). No self-respecting iron junkie can turn down that kind of deal!
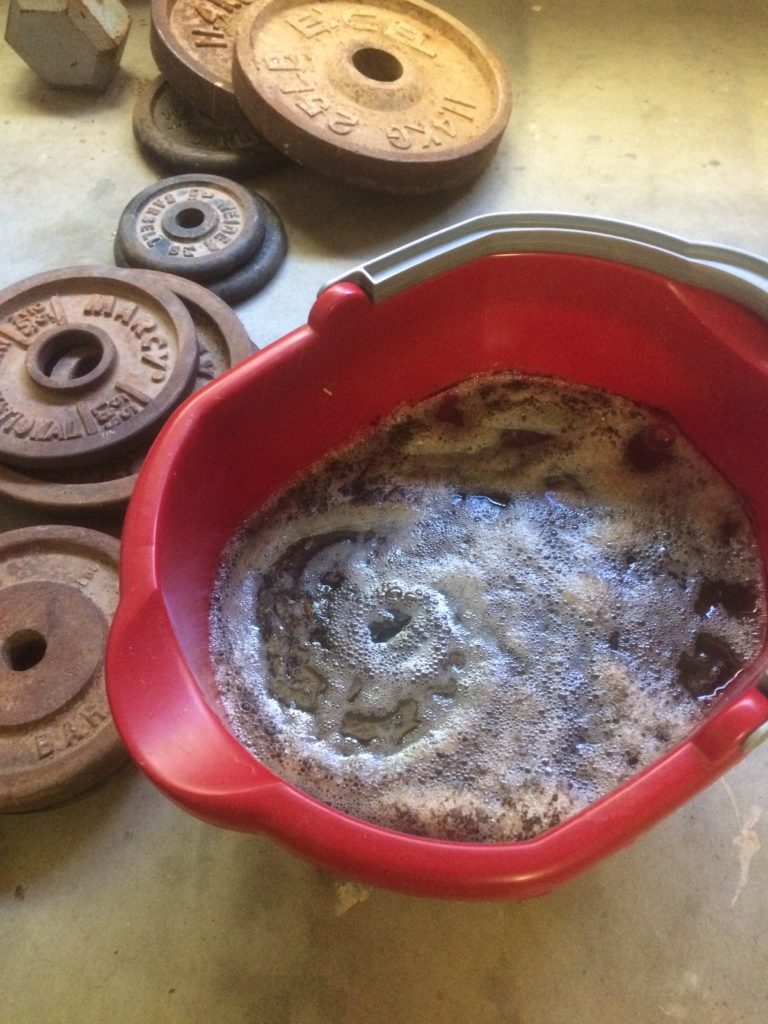
I had seen guys get good results with vinegar, so I decided to try it. I put a couple of gallons of it in a bucket and added a little water just to fill it up. I repeated the process a few days later with a larger plastic tub.
Here’s the bottom line: vinegar is messy and can take a few days, but it’s very effective. I still had to use a brush to get the plates ready for repainting, but the vinegar did about 90% of the work for me.
I used Rust-Oleum Universal All Surface Paint and Primer again to paint this set. Here’s one thing I noticed this time around: the “flat black” color didn’t give me as much trouble in terms of the plates sticking to the cardboard when I flipped them over. I guess glossy colors take longer to get completely dry.
Here’s the before/after picture:
I painted the 15 kilo set silver with the idea of making sure I didn’t confuse it with a 35 lb. plate. I wasn’t crazy about how it looked, so I went with with something more subtle for most of the other metric plates (I painted the weight numbers in red to differentiate them from the other weights).
The Third Project (the fastest method)
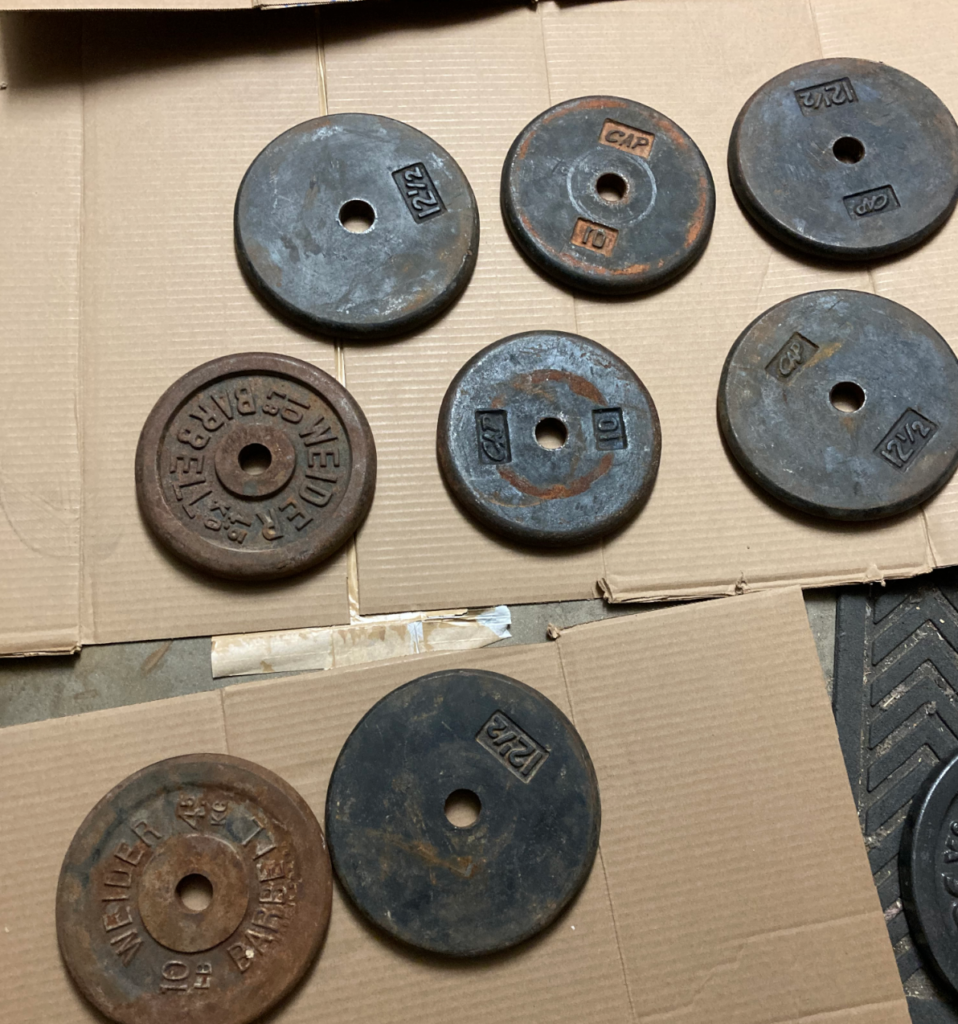
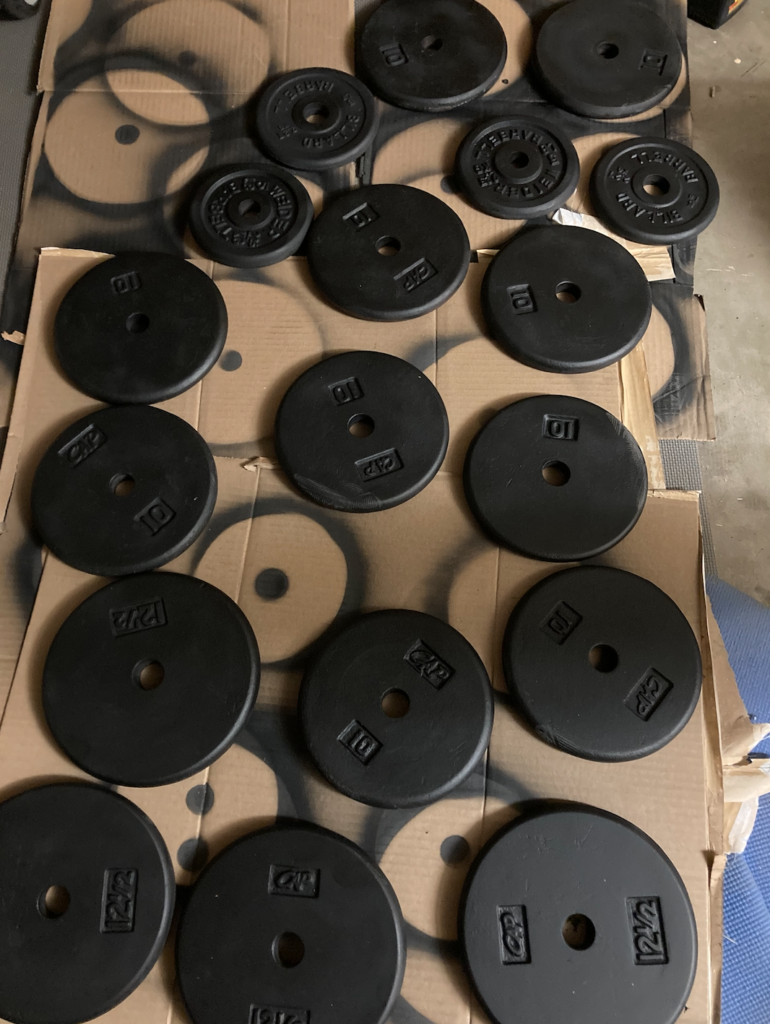
My third bulk purchase of used weights came a few years later. I had been looking for some one-inch weights, especially 10-lb weights, in order to have more options with dumbbell training. I ran across a pretty good deal on Facebook marketplace: 200 lb of weights (which included twelve 10-lb weights), a few dumbbell handles, and a small weight tree for 200$.
One or two of these weights would need the vinegar bath treatment I’ve already described (like the one pictured bottom left of the “before” picture). But most of them were in pretty decent shape, and I wanted to try a quicker, easier method. I just wanted to prevent further rusting and get them looking a little better.
I decided to use Rustoleum Rust Reformer for this job. This product just “transforms rust into a non-rusting surface” according to the instructions. I have to say I was pretty impressed with the results:
I believe the only real reason to paint over this product is to change the color or maybe provide a little extra protection against the elements. Neither apply here, so I think these will be perfectly usable as they are. I think using a rust converter/sealer product is the quickest/easiest way for projects like this: treating several weights that are not in bad shape. And if you are satisfied with a flat black look you probably don’t need to follow up with paint.
Now to put these to use . . .
See Also: Garage Gym–One Year Later